


If you’ve completed a clean installation and are staring at TxAdmin’s initial setup screen, wondering “What do I do now?” — don’t worry! This guide will walk you through every step.
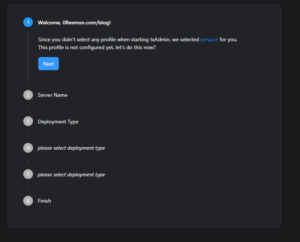
Step 1: Welcome Screen
On the first screen, you’ll see a welcome message. Simply click the Next button to proceed.
Step 2: Server Name
The next screen will prompt you to enter a name for your server. We’ve chosen “0resmon Blog Server”, but you can name it anything you like. Once done, click Next to continue.
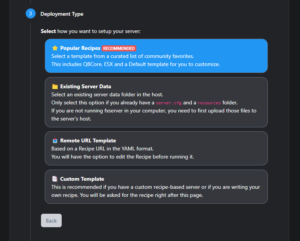
Step 3: Choosing a Deployment Type
Here, you’ll see various deployment options.
- For a clean installation with no frameworks, select Custom Template.
- For this guide, we’ll proceed with Popular Recipes to explore pre-configured server frameworks.
Click Next after making your selection.
Step 4: Selecting a Framework
The Popular Recipes screen will show you several pre-made server frameworks. At the time of writing, the available options include:
- CFX Default RedM
- VORP Core
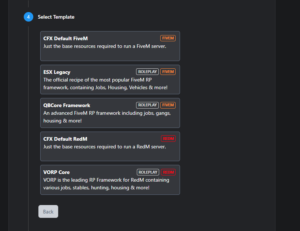
Note: Frameworks labeled with “RedM” are for RedM servers, while those labeled “RedM” are for RedM servers. If you’re interested in deploying a FiveM server, check out our guide: “How to Deploy Frameworks for FiveM Servers“.
For this tutorial, we’ll select VORP Core and proceed.
Step 5: Choosing the Installation Location
You’ll now be asked to select a folder on your computer where the server will be installed. Choose any location you prefer and click Next.
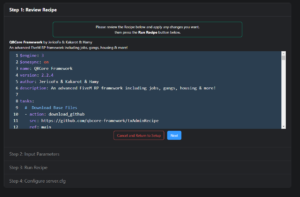
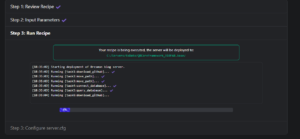
Step 6: Deploying the Server
Click the Go to Recipe Deployer button to start the installation.
Once the deployment begins:
- A server.cfg file will appear, allowing you to customize your server name and settings. Feel free to make adjustments and click Next to proceed.
Step 7: Entering Your CFX License Key
The setup will prompt you to enter a CFX license key.
- If you don’t have one, generate a key on Keymaster.
- Need help? Check out our guide: “How to Get a CFX License Key”.
Step 8: Installation in Progress
Sit back and relax as the progress bar fills up. During this time, the server will download necessary files from GitHub and other platforms.
Step 9: Finalizing the Installation
Once the installation completes, you’ll see the server.cfg file and the folder where your server is installed.
- Revisit the server.cfg file if you wish to make additional changes.
- Finally, click the Save & Run Server button to start your server.
Important Notes
- Since a framework like QBCore requires a database, ensure you have an SQL server installed on your computer.
- If you’re unsure how to set this up, read our guide: “How to Install SQL Server and XAMPP for RedM“.
- Errors during setup are often caused by missing SQL configurations.
With these steps, your RedM server will be ready to run smoothly! 🎮
TxAdmin is a built-in web-based management tool for RedM servers. It simplifies server setup, management, and deployment of frameworks like QBCore or ESX Legacy.
On the second setup screen, you'll be asked to enter a name for your server. You can choose any name you like. For example, we used "0resmon Blog Server" in this guide.
Custom Template: A clean server with no frameworks installed. Popular Recipes: Pre-configured setups with frameworks like VORP, QBCore, or CFX Default RedM.
Yes, you can manually add a framework later. However, starting with a pre-configured recipe saves time and ensures all required files are set up properly.
A CFX License Key is required to run your RedM server. You can create one for free at Keymaster. Ensure you link it to your RedM account and server IP.
Frameworks like QBCore or VORP Core store essential data "player information, inventory, etc." in an SQL database. Without it, these features won’t work correctly.
Yes, during the setup, you can select any folder on your computer. Make sure the location has sufficient storage and is easy to access for future updates or modifications.