


If you’ve completed a clean installation and are staring at TxAdmin’s initial setup screen, wondering “What do I do now?” — don’t worry! This guide will walk you through every step.
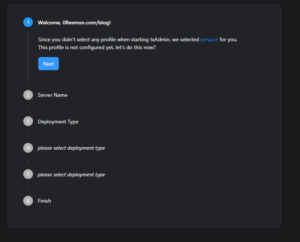
Step 1: Welcome Screen
On the first screen, you’ll see a welcome message. Simply click the Next button to proceed.

Step 2: Server Name
The next screen will prompt you to enter a name for your server. We’ve chosen “0resmon Blog Server”, but you can name it anything you like. Once done, click Next to continue.

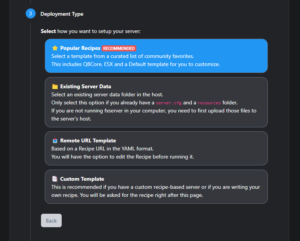
Step 3: Choosing a Deployment Type
Here, you’ll see various deployment options.
- For a clean installation with no frameworks, select Custom Template.
- For this guide, we’ll proceed with Popular Recipes to explore pre-configured server frameworks.
Click Next after making your selection.
Step 4: Selecting a Framework
The Popular Recipes screen will show you several pre-made server frameworks. At the time of writing, the available options include:
- CFX Default FiveM
- ESX Legacy
- QBCore Framework
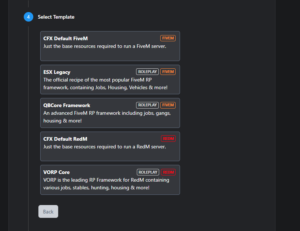

Note: Frameworks labeled with “FiveM” are for FiveM servers, while those labeled “RedM” are for RedM servers. If you’re interested in deploying a RedM server, check out our guide: “How to Deploy Frameworks for RedM Servers“.
For this tutorial, we’ll select QBCore Framework and proceed.
Step 5: Choosing the Installation Location
You’ll now be asked to select a folder on your computer where the server will be installed. Choose any location you prefer and click Next.

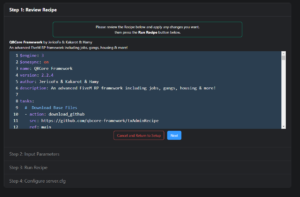
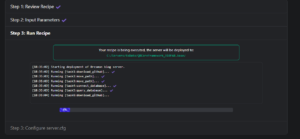
Step 6: Deploying the Server
Click the Go to Recipe Deployer button to start the installation.
Once the deployment begins:
- A server.cfg file will appear, allowing you to customize your server name and settings. Feel free to make adjustments and click Next to proceed.
Step 7: Entering Your CFX License Key
The setup will prompt you to enter a CFX license key.
- If you don’t have one, generate a key on Keymaster.
- Need help? Check out our guide: “How to Get a CFX License Key”.
Step 8: Installation in Progress
Sit back and relax as the progress bar fills up. During this time, the server will download necessary files from GitHub and other platforms.

Step 9: Finalizing the Installation
Once the installation completes, you’ll see the server.cfg file and the folder where your server is installed.
- Revisit the server.cfg file if you wish to make additional changes.
- Finally, click the Save & Run Server button to start your server.
Important Notes
- Since a framework like QBCore requires a database, ensure you have an SQL server installed on your computer.
- If you’re unsure how to set this up, read our guide: “How to Install SQL Server and XAMPP for FiveM“.
- Errors during setup are often caused by missing SQL configurations.
With these steps, your FiveM server will be ready to run smoothly! 🎮